Guidelines
Refer to the main page for more information. You can simply refer to how the previous edits are done and ignore this page. Simply put, highlight everything the previous edit is formatted, copy and paste below, alter whichever information you want.
WHEN YOU EDIT, PLEASE PRESS THE EDIT BUTTON AT THE VERY TOP OF THE PAGE. EVERYTHING IS SCREWED UP IF YOU DON'T.
A must do for posting edits: Before you post an edit, right click on the previous edit's right box, and select 'Row > Insert Row After'
Please keep your images aligned on the left side. The page will be more organized this way.
How to post edits
 |
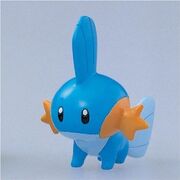
Example of the format (Character, Armor, Weapon, Shield) Mudkip from Pokemon By Siohn |
Changelogs
|
Making updates on your edit, but not by simply replacing the link. These updates are called 'Changelogs', which notifies people that you have updated your edit. Completely optional. |
Mudkip (link) (Character, and/or Armor, Weapon, Shield) <Description> By <Editor> When you want to update the above link, firstly, replace the link with the new one. Then, follow these steps (continued): Changelog:(Must be in Heading 4) (00/00/0000)(Updated date. Must be in Heading 5)
Include your description about your update. If you have really followed these steps, look at the contents page on the Character Packs page if you have posted an edit. Your character's name will be similar to the contents page on top of this page. If not, redo the previous steps. |
Side views and such
|
<insert picture> |
Further information on your edit lies here. You might be wondering if your left box might be too packed for your Front views, Back views and Side views. Here is a short tutorial on how to put external links so that your other views can be seen. Mudkip (link) (Character, and/or Armor, Weapon, Shield) <Description> By <Editor> Side view (link) l Back view (link) First off, one spacing after the credits. Click on the 'Add link' icon on the edit menu on top and paste your side views and such. Put a letter 'L' between the links to separate them. If it's not on Google, upload your images on image hosting sites, e.g Photobucket, imageshack. Copy and paste the link. Follow the above instructions and you should be fine. |
|
<insert picture> <insert picture> <insert picture> |
You can just insert your images in a vertical order if it makes it easier for you. |
Weapon, Armor, Shield Edits
Instructions that regards on how to post your weapon, armor and shield edits in the respective sections.

|
Insert your image. IF YOU USED ICONO.PNG IT MUST BE RENAMED! Do this by clicking on the left box, and inserting the picture. The layout of the picture must be in Full Size. |
| <insert picture> |
After doing so, follow how the previous edits are formatted. Cupid's Blade (link) (Click on the Add link on the edit menu on top.) <Description> (Optional) By <Editor> |
PC Edits
When you want to save an edit in-game, click on Export on the edit menu and select your destination folder. Note that the type of file you export will only be a 4bit *.bmp format, you cannot change that.
To install the edit, download the BMP(s), then go into game, go to Edit, choose your character, select advanced, press menu, then press import then navigate to your BMP sprite sheet, and select.
Posting PC edits is pretty much the same as the other sections; USA Characters, Weapons, Shields, etc. However, the download link will only be a bitmap file, there is no ICON0.PNG or anything, just a single file that has a green background and looks like a spritesheet.
An optional job you can take is being an exporter. Being an exporter means that you copy an existing edit on the PSP to PC by manual pixel by pixel work. Of course, you take the credit for exporting it, and it saves the creator the trouble to convert the edit to the PC format by himself/herself.

|
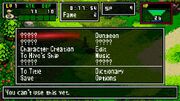
<insert picture> To take a screenshot in game, set your game's resolution to Full Screen. Press the Print Screen button on your keyboard, open up Paint, then press Ctrl+V. Save the screenshot in any selected destination folder. ;Note that screenshots are different from your download link as the wikia is not able to host .bmp images. Your image should be in .png or .jpeg format. Of course, you can choose to crop it in any way you like, but I recommend this as it is the most organized way. |
Insert your image on the left box. Click the 'Photo' icon on the right hand side and choose your image. Set your image to: Layout > Thumbnail > 250px Alignment > Left. |
  |
E.g Test (Character, Armor, Weapon) < Image By Siohn |
PC Weapons, Armors, Shields
- Instructions may change accordingly.
|
<insert picture> To take a screenshot in game, set your game's resolution to Full Screen. Press the Print Screen button on your keyboard, open up Paint, then press Ctrl+V. Save the screenshot in any selected destination folder. ;Note that screenshots are different from your download link as the wikia is not able to host .bmp images. Your image should be in .png or .jpeg format. Of course, you can choose to crop it in any way you like, but I recommend this as it is the most organized way. |
Insert your image on the left box. Click the 'Photo' icon on the right hand side and choose your image. Set your image to: Layout > Thumbnail > 250px Alignment > Left. |
| <insert picture> |
After doing so, follow how the previous edits are formatted. Weapon/ Armor/ Shield (link) <Description> By <Editor> |
And you're done! Be sure to include credits. You wouldn't want your downloads to be anonymous.
Notes:
- Please use MediaFire for hosting your edits, as it is the "simplest" to use for everyone involved.
- The easiest way to list any new content is to just follow the example set by the content before you.
- If you use ICON0.PNG as a screenshot, RENAME IT.
- Please do not include more than one weapon/armor/shield in an upload. Too many icons on one line is cluttered and may break the wiki. Only include Character Packs on the appropriate page, otherwise upload individually.
- Please don't upload anything inappropriate. Note, inappropriate is not necessarily synonymous to offensive.
- You can upload anything you want (ex. Etna even though there is already an Etna) but usually there is no point, frankly put.